
 1st June 1985
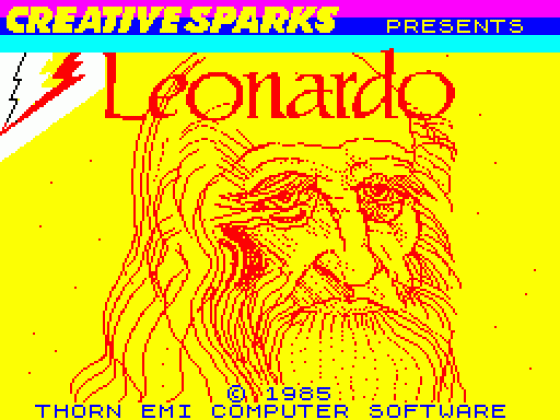
Leonardo
FRANCO FREY gets to grips with one of the biggest graphics utilities this side of the Pre- Raphaelites IT SEEMS a long time since we introduced the Leonardo competition and here we are finally reviewing the instrument of all creations.
Creative Sparks has not been sleeping since, but have been suffering from the bug common to all creative sparks of never being pleased of their product, changing it here and there until finally an outside force intervened and separated the masterpiece from its creator. Thank God for the financial men as the public would be suffering even now....
Leonardo enters the world as an instrument which 'enables you to create complex pictures and graphic elements using the full capabilities of the Spectrum computer '. This means the creation of complete pictures, User-defined graphics and complete alternative character sets and picture elements which may range in size from a single pixel to a full size picture.
As a result of the long incubation, Leonardo has become a heavyweight of a utility and to do it full justice CRASH is forced to extend the review over two issues. This first pan will deal with the basic drawing facilities and the second with programmed drawing, windowing and texture. Let's take a closer look and put pen to paper....
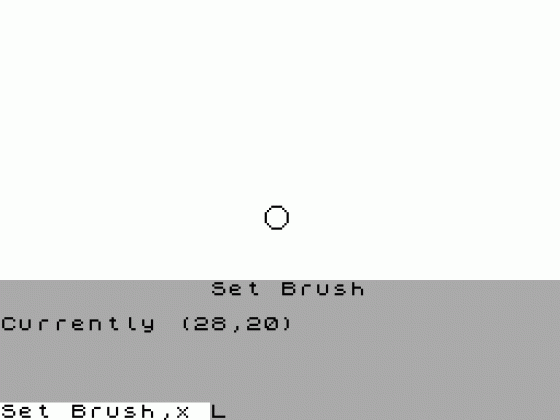
LENNY'S BASICS Unlike Leonardo da Vinci the user gets a choice of selecting keyboard control or one of the many joystick interfaces which include Sinclair, Kempston, AGF, Protek and Fuller. This opens up the gateway to the production screen. Surprisingly the screen is void of any status window but the usual information is hidden away craftily to be revealed at a key stroke. Pressing Shift 2 displays the co-ordinates at the top left of the screen, or Shift 3 at the bottom left. Shift 4 undoes the damage. If you've digested that, pressing 1 will reveal the full screen INFORMATION WINDOW as long as the key is pressed. This shows the current status of the program and includes all kinds of information about current mode, cursor, line, brush and picture details which will all make sense once you have studied the manual carefully.
Coming back to the basics, the pen or brush is controlled by selecting one of several keys. Key P puts you into plot mode and lets you draw to your heart's content, key 0 (or the fire button) into cursor mode and lets you skip over the paper. Key 0 enables you to undo any harm done (Unplot mode) and Shift 0 gets you into Invert mode, which obviously inverts the pixels' status. Your 'pen ' may be convened into a brush by setting the brush size, key M. As usual, calling a function requiring input parameters, will replace the bottom third of the screen with the Input Window, with instructions on the information you have to key in. The brush size may be varied in x and y direction independently, a very good feature this, which enables some crafty design work. The pen and cursor default speed may prove to be too slow, so key I will let you select the x and y increments, which will allow you to draw fast chunky graphics. There is no pen speed control as such, only the definition or increments will be changed, so if you require pixel resolution, you're stuck with the one speed.
Dotted lines may be drawn with the key F function which lets you select a mark/space ratio of any size (integer values).
ON THE LINE A host of options are provided for drawing straight lines. As usual line drawing requires a second variable to the cursor, the Last Plot. At the beginning this is set to the middle of the screen. Shift Z positions Last Plot to the current cursor position. After moving the cursor to the new position, a line can be drawn using Shift Q. The Last Plot position is not updated however so that if the cursor is repositioned all lines will originate from the same Last Plot position. Drawing a line with key Q sets the Last Plot to the cursor position after each line draw and the lines are linked to each other. More sophisticated lines can be drawn with the use of Boundary and Direction settings. If the boundary is on, the program detects any set pixel intersection and the line will be plotted up to or from this point onwards depending on the setting of Direction. Keys R and Shift R will set Boundary and Direction. This function is very useful for hidden line drawings and also for guaranteeing airtight shapes for later filling. Horizontal and vertical lines may be drawn through the cursor with the W and Shift W keys and the line limits are set with the first encounter of a set pixel.
Curved lines are amply catered for with the normal circle function (key A with the radius as variable) and arc using cursor and Last Plot positioning and Arc angle variable (key S). The jewel of the curved line functions is the Ellipse function. Any type of ellipse may be drawn with the use of up to five variables: Vertical radius, Horizontal radius, Rotation, Stan angle and Turn angle. The use of start angle and turn angle allows any part of an ellipse to be drawn, and if there is a criticism it is whether the user will be able to cope with the wealth of these variables and put the ellipse to screen which he actually requires.
FITTING FILLINGS Shift U fills the area indicated by the cursor and operates at a fairly rapid pace. Should you be worried that your precious drawing may be obliterated by an unsuccessful (or too successful) fill, have no fear, key Y will restore the previous condition. Y will operate with almost any function other than Cover and provides a useful error protection.
ADDING COLOUR So far the work carried out was purely setting and resetting pixels in all kinds of order on the screen. For colour work the attribute mode is entered by pressing key B. The flashing Pixel Cursor is replaced with the Character Cursor. As with a paint brush the colour pots have to be selected and this is done using key Q. The program prompts for Ink, Paper, Bright and Flash. Putting the colour brush to paper is accomplished with key W and moving around the cursor will leave the required colours in the attribute characters. The brush may be lifted with key 0 (Cursor mode). There is a special Character Information Window on call up which displays all the current colour settings. The position of the cursor is shown in character spaces from the top left of the screen together with the colour of the screen in the cursor position. The character step increment settings and the current colour settings are also displayed.
When changing the colour settings there is an option of inputting n as an entry for the settings which require no change. This allows only one attribute to be changed and speeds up the process immensely. Special colouring functions include the change of colour of the whole screen or window with key A and Colour swap, which will exchange any attribute characters on the screen of given colour settings with the new settings. The function prompts for the old and new colour settings and changes any attribute characters that match with the new colours.
Last but not least colour patterns can be created on the screen by using the window facility which will be explained in the next issue. A window is created on the screen and filled with the required colour pattern. By setting the step size of the brush to be similar to the size of the window and entering the key F function, the brush may be positioned at the desired place and the 0 key or fire button toggled. The window will be copied into the new position and the entire screen may be covered with the pattern if so required.
In the next issue Leonardo will display its special features which include the Windowing technique providing magnification and repositioning of part of your picture, the UDG creation, the creation of tenure using the COVER facility and the very versatile and powerful Programmed Drawing facility which provides routine drawing of figures and patterns.
Other Spectrum 48K Game Reviews By Franco Frey


Screenshots